Sunday 29 August 2010

Bake It! Toffee Pecan Ring

You have probably guessed from the fact that I have left it a month between blog posts that I have been too busy to get round to blog writing - the truth is much worse. I have, in fact been so busy that I have barely had time to cook never mind make anything worth writing about.  I have recently started back at university to do my post graduate teaching diploma and it has lead to big changes in our home. I have spent the last six months or so being a more-or-less full time housewife and am now a commuter and full time student, with lots of homework, reading and research. Any cooking I have done has been tried and tested recipes and filling the freezer with the easily re-heated meals and banana muffins. 

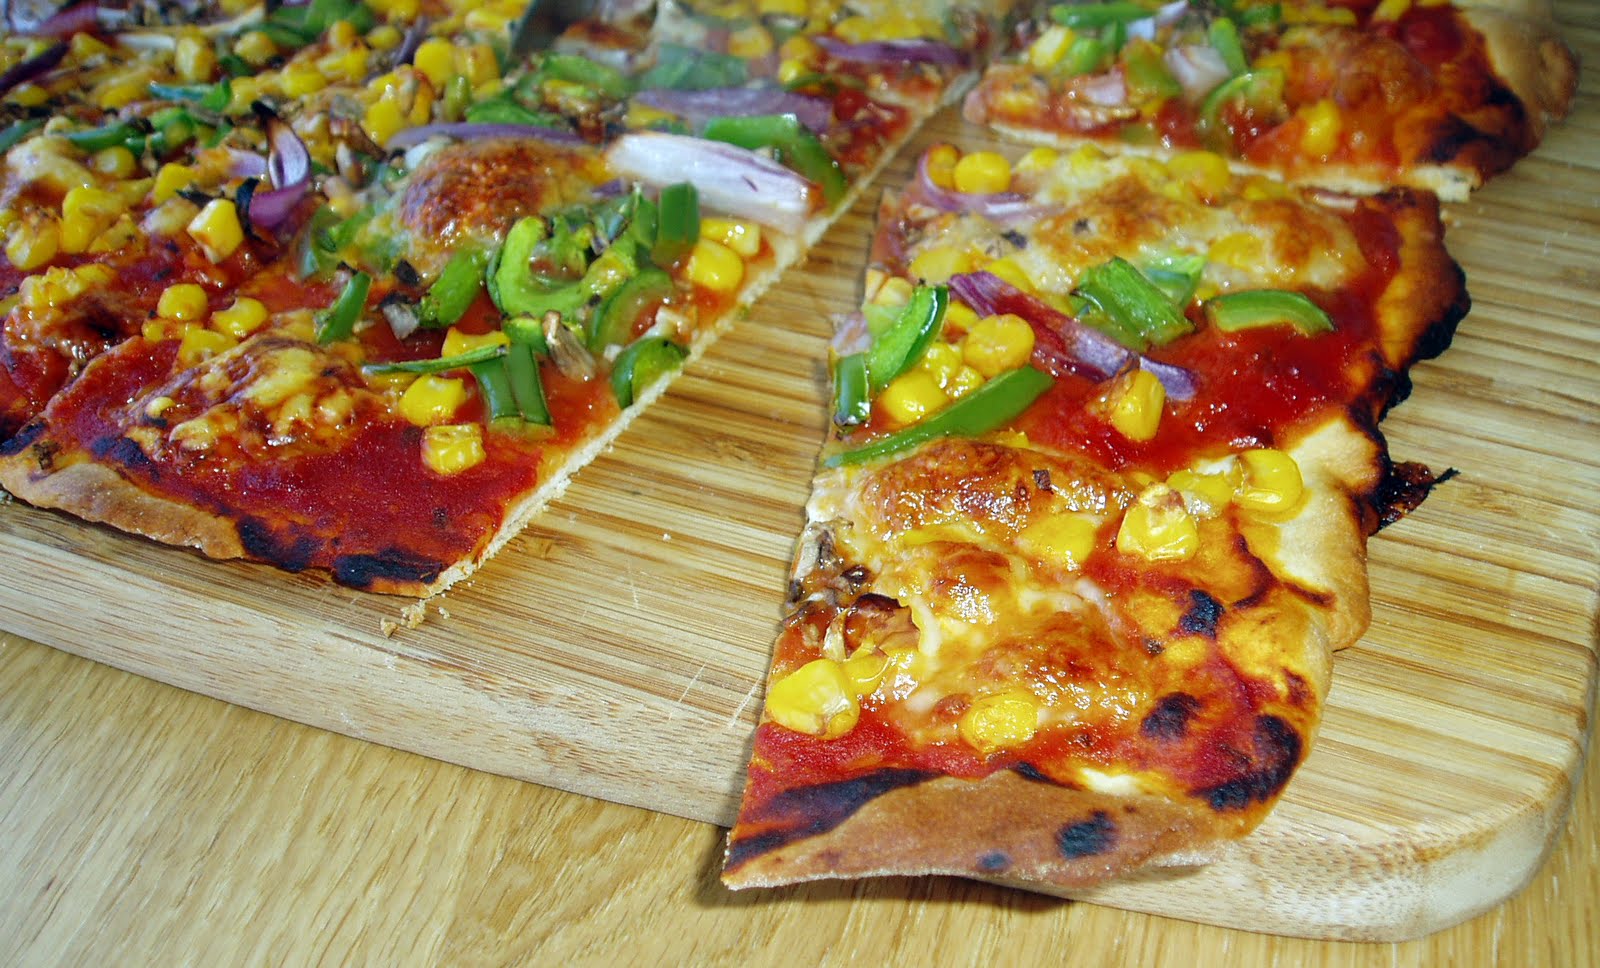
Things have been so hectic that when we had house guests last weekend I resorted to shop bought pizza bases. The bases themselves were the fresh kind that you find in the chilled section next to the pastry and not the thick cardboard ones so the resulting pizza was tasty and enjoyable - just not up to my usual hostess standards. To make amends I decided that the latest Bake It! challenge from Cooking, Cakes and Children would be the perfect after dinner treat - and it was. It also went down extremely well re-heated with coffee the next morning.


Toffee Pecan Ring


75 g butter, diced
450 g self raising flour
50 g caster sugar
2 eggs, beaten
150 ml milk

25 g butter, melted
75 g pecans
2 tbsps light soft brown sugar
50 g dark chocolate chips
1 packet Rolos, quartered
1 tbsp milk to glaze
25 g dark chocolate, melted

  • Preheat the oven to 180°C. Grease the bottom of a 10 inch round baking tin.
  • Rub together the butter and flour until it resembles fine breadcrumbs.
  • Mix in the sugar then add the eggs and milk, a little at a time. Mix until it forms a soft dough.
  • Turn out onto a lightly floured surface and roll out to make a square of approx 35cm.
  • Coarsely chop the pecans and mix in the soft brown sugar.
  • Brush the dough with the melted butter then sprinkle over the pecan and sugar mix, chocolate chips and chocolate toffees, leaving a 2.5cm border at the top and bottom.
  • Starting at the edge nearest to you, roll up the dough tightly like a swiss roll, then cut it into 2.5cm slices. You should get about 12-14 slices.
  • Lay the slices around the edge of your baking tin at a slight tilt so they overlap a little.
  • Brush the top with a little milk and bake for about 20-25 minutes, until they are golden and cooked through.
  • Leave to cool for 10-15 minutes in the tin and then transfer to a wire rack to cool. Drizzle the top with melted chocolate.

Thursday 29 July 2010

Bake It! Lemon Squares

I love baking. Baking requires a kind of concentration that you don't need for regular cooking and I love to totally immerse myself in a recipe - my own personal method of relaxation and meditation. I also love the end product, although apart from my post baking cake and cuppa I try and avoid my creations, unless the recipes are suitably virtuous and healthy.  As it is just myself and Mr M in the house I never have the opportunity to get baking as much as I want. This means that I will jump at whatever chance I may have to get baking - birthdays, exam passes, visitors - as I write this I have blondies cooling in the kitchen and a tray of brownies in the oven, for my friends hen weekend. So imagine the joy I felt when I read about Amy Lane's Bake It! club in her blog Cooking, Cakes and Children. Not only did signing up for this club give me a monthly excuse for getting baking but July's recipe for Lemon Squares were a perfect antidote to the dismal Scottish weather.

I have copied the instruction straight from the Cooking, Cakes and Children blog but as I don't have a food processor or pastry blender I made it the old fashioned way, I always find that there is something extremely therapeutic about rubbing the fat into the flour by hand. The recipe itself was easy to follow and the Lemon Squares were absolutely delicious. I am looking forward to trying the recipe again soon and am even contemplating substituting limes for the lemons to give it a bit of a twist. As for the Bake It! club I had a fantastic time with this months recipe and I can't wait for next months challenge!

Lemon Squares


Base:
50g plain flour


75g icing sugar
175g butter, chilled and diced
pinch salt
1/2 tsp vanilla extract

Topping:
2 unwaxed lemons


4 eggs
50g plain flour
1/2 tsp baking powder
 icing sugar for dusting

  • Preheat the oven to 180°C and grease a baking tin, approx 24cm x 24cm x 4cm.
  • Put the shortbread ingredients (flour, icing sugar, salt, butter and vanilla extract) into a food processor and process until the mixture resembles fine breadcrumbs. If you don’t have a food processor you can rub the fat into the flour and sugar by hand or using a pastry blender.
  • Tip the mixture into the baking tin and press down with a spoon and/or your hands.
  •  Bake for around 15 minutes until a light golden colour, remove from the oven but leave the oven on.
  •  Grate the lemon zest and squeeze out the juice. Put this in the food processor with the rest of the topping ingredients and blitz briefly to combine into a thin batter. Again, if you don’t have a food processor you could use a whisk.
  •  Pour the mix over the base and put back in the oven for another 15 minutes, until the topping is just set.
  •  Remove from the oven and allow to cool completely. Then cut into squares and dust with icing sugar. This recipe will make about 20 squares.

These are not suitable for freezing but can be kept in an airtight container for 4 days.


Thursday 15 July 2010

Lentil and Carrot Pâté

During my times as an undergraduate I flirted with vegetarianism. Unlike my flatmate at the time, who had a range of 'I am a cute little pig/lamb/chick please do not eat me' t-shirts, I became a vegetarian first as a reaction to the failure of the caterers at my university halls of residence to cook anything appetising, by my own inability to cook meat and the ease of sharing cooking with my vegi flatmate when I moved into a shared flat.
For the most part I enjoyed my life as a vegetarian, the meals that we concocted in the overcrowded kitchen of our student flat were often experimental and less than successful, but we had fun creating them. I did, however discover an allergy to Quorn which is something of a disaster for any self respecting student, never mind a vegi one. 
My biggest test as a vegetarian came when I went to my parents for the Christmas holidays. In our family Christmas is the biggest production of the year (I am hosting the annual feast for my parents, Mr M'  parents and my baby sister this year so be prepared for plenty of festive blogs as the year progresses) and  the main includes no fewer than 5 different types of meat and as a general rule more side dishes than people sitting round the table! It was the latter point that saved me during my flirtation with vegetarianism as I was more than happy to eat the vegetables and potatoes. My main problem came with the second course (or was it the third?) -  pork liver Pâté. I was determined not to give in to temptation and to prove that I could come up with a tasty meat free alternative, so to my mothers horror I made myself a Lentil and Carrot Pâté as an alternative. Unfortunately I don't think this vegetarian delight survived my mothers scrutiny to make it onto the Christmas dinner table, although my memories were of a rather tasty if unlike any Pâté I had ever had before. More recently attempts to loose weight led to me investigating vegetarian Pâté once more (I had a particularly bad experience with a well known Supermarkets low fat Brussels Pâté) and I developed this slightly more grown up and more tasty version of the Lentil and Carrot Pâté of my youth. 

Lentil and Carrot Pâté
 (Serves 4-6 as a snack or light lunch) 


200g red split lentils
1 tsp ground cumin
1 tsp ground coriander
200 g carrots, grated
1 tbsp olive oil
1 medium onion finely chopped
2 lg garlic cloves, crushed
50g Light olive oil spread
2 tsp cumin seeds
1 tsp coriander seeds
Salt and pepper


  • Boil the lentils with the ground cumin and coriander for 10 minutes, add the carrots and boil for a further 10 minutes, until the lentils and carrots are soft. 
  • Meanwhile heat the olive oil in a large frying pan and cook the onion and garlic gently until soft but not coloured. 
  • When cooked drain the lentils well and transfer to a large bowl, add the cooked onion and garlic, light Olive oil spread and mix well.
  • Fry the cumin and coriander seeds in a dry pan until fragrant and add to the lentil mixture. 
  • Season the lentil mixture to taste and chill for at least two hours. 
This is delicious with toasted bread and salad as a light lunch. 

Tuesday 15 June 2010

Broad beans, ham and tomato.

After two months of being in our new house we have finally found a farm with an organic veg box scheme that will deliver to our area! We first decided to get a veg box delivered a few years ago when we lived in the centre of the city and found that the quality and shelf life of the veg we were buying at the supermarket was often unpredictable and not always worth the price. Both our old and new schemes are reasonably priced when compared to supermarket prices and the fruit and veg that is delivered are far better quality. When our new box arrived the fruit and vegatables were wonderfuly fresh and exciting and I couldn't wait to get stuck in. I was delighted to find the inclusion of broad beans in our first box, they are one of Mr M's favourites and would go perfectly with the ham I had just boiled. This dish is a simple, quick and tasty one that goes really well with a simple salad and garlic bread.


Broad beans with ham and tomato
(serves 2)
150 g boiled ham, cubed
2 small red onions, finely chopped
225 g cherry tomatoes, halved
2 garlic cloves, chopped
100 g broad beans, weighed after shell and skin removed
1 tbsp olive oil
1 tsp oregano


  • Boil the beans in a large pan of water for 10 minutes, until they are tender.
  • Heat the olive oil in a large frying pan and add the onion and garlic. Fry until soft but not browned.
  • Add the cubed ham and fry for a further minute. 
  • Add the tomato and herbs and fry, stirring for 2 minutes.
  • Add the cooked beans and cook for a further two minutes.

Wednesday 26 May 2010

Granola

I have never been a big fan of breakfast, not the relaxed weekend breakfast that is one of my guilty pleasures, but the rushed weekday breakfast. The one that you know is good for you but that you just can't stomach before you have to dash out of the house and often skip in favour of vast quantities of coffee. In recent years I have made a concerted effort with weekday breakfast but often find pre-packaged cereals a chore and often get bored with them before the end of the box. I was introduced to the joys of granola and yogurt as an alternative breakfast through a friend and a pre-packaged supermarket pot, and while I found this a pleasant way to start the day I found that shop bought boxes of granola are often oily, expensive and scrimp on the fruit. 

I decided that making my own granola would be the perfect solution to getting granola just the way I like it. I used a recipe for Not-Too-Crunchy Granola from The Desperate Housewives Cookbook (a gift from Mr M after a business trip to the Sates) as a base but have adapted it to make it less oily and just the way I like it and to reflect the dried fruits and nuts in the cupboard. I especially like serving granola with natural yogurt and berry compote.

Granola
(Adapted from The Desperate Housewives Cookbook)

FryLight sunflower spray (I found this the best way to make the granola less greasy)
3-cups porridge oats
1/2 cup oat bran (or wheat germ)
1 cup flaked almonds (or any nut you prefer)
3/4 cup dessicated coconut
1/3 cup maple syrup (or honey)
1/3 cup light brown sugar
1/3 cup sultanas
1/3 cup dried cranberries
1/3 cup dried blueberries (or your favourite dried fruit)
1 cup banana chips, broken into pieces (make sure you get crunchy banana chips, the softer ones tend to go slimy when you add milk or yogurt)


  •  Preheat the oven to 1500C (fan assisted).
  • Spray a large, deep pan with the sunflower spray, add the oats, bran, nuts and coconut. Mix well and spray a few more times with the sunflower spray. Make sure the mixture is spread evenly onto the tray and bake stirring occasionally. 
  • Whisk the syrup and sugar with 2 tbsp of water in a jug. When the oat mixture is lightly browned (around 40 min) drizzle over the syrup mixture and stir well. Bake, stirring occasionally until the mixture is dry and crunchy but still light brown (15 - 30 minutes), you need to keep a close eye on the mixture to avoid burning. 
  • Remove from the oven and stir in the banana chips and fruit. 
  • Store in an airtight container.

Saturday 22 May 2010

Lower Fat Lemon Yoghurt Cake

The first time my now mother-in-law cooked for me she made the most wonderful butternut squash and cream cheese soup using a great recipe from The New Dairy Cookbook by Sue Ashworth. This is a great book that is a modern version of the Milk Marketing Board's dairy cookbooks that graced my own mothers shelves. After borrowing the book for an extended loan I decided that I should invest in a copy of my own. By definition the book does not always lend itself to low fat and healthy cooking but the availability of low fat dairy products and a little tweaking can produce some very tasty low fat meals.
My Lower Fat Lemon Yogurt Cake is adapted from the books Natural Yogurt Orange Cake and the result is a zingy lemon cake with less guilt.

Lower Fat Lemon Yogurt Cake
Adapted from New Dairy Cookbook's Natural Yogurt Orange Cake
(Serves 8 - 10)

150 g Stork Margarine, melted and cooled
2 lemons, juice and zest finely grated 
150 g golden caster sugar
150 g low fat natural yogurt
1 tsp vanilla extract
250 g self-raising flour
salt, pinch
2 medium eggs


  • Preheat the oven to 155oC (fan). Grease a 24 cm round spring-form cake tin and line with baking parchment.
  • Put the lemon juice in a jug and add 1 tbsp of the sugar, leave to one side.
  • Put the lemon zest, sugar, margarine, yogurt, vanilla, flour, salt and eggs into a large mixing bowl. Beat thoroughly for 1 minute.
  • Bake in the pre-heated oven and bake for around 1 hour until risen and golden.
  • Place the cake, still in the tin on a cooling rack and pour over the lemon juice. Allow the cake to cool in the tin.

My cake looks considerably flatter than that in the book, this is probably due to the larger diameter of cake tin used. The original recipe also suggests putting orange slices on the top of the cake, I decided not to put lemon slices on top for fear of them being bitter after baking.

Friday 21 May 2010

30-Day Muffin Round Up

As promised some more flavour ideas for the 30-day muffin recipes:

Apple and Raisin Muffins:
(makes 6-8 muffins)

2 small eating apples, peeled and chopped
100 g raisins
400 ml 30-day muffin batter
These were very tasty, I was a big fan of the juicy raisins and perhaps added a few more than was really needed. Mr M thought they would be better without any raisins so I made some without for the next batch.

Apple Muffins:
(makes 4 muffins)

2 small eating apples, peeled and grated
200 ml 30-day muffin batter
These muffins were a little flat, I think I tried to stretch the batter too far. Mr M loved the result though.

Cherry and Almond Muffins:
(makes 5 muffins)

1/3 cup ground almonds, plus extra for topping
Handful of chopped glace cherries
300 ml 30-day muffin batter
These were extra moist, I think this was probably due to the ground almonds. Next time I have a batch of batter in the fridge I may be tempted to add the almonds to every combination of ingredients, they don't add much flavour and will be a big improvement to the texture.

Thursday 20 May 2010

Vegi Pizza

 I have mentioned the 'upside down' pizza incident before and think it is time to explain. In the 3rd and 4th years of my undergraduate degree I shared a fantastic (yet damp) flat in Aberdeen with Miss D (vegetarian) and Mr F (omnivore) where we shared kitchen adventures on a budget - blue and white stripy canned tomatoes, bulk bought cheese and pasta featured heavily. On new years day Mr F and I decided to make pizza for dinner, and with the help of some shop bought pizza bases and lots of red cheddar we produced three spectacular pizzas - 1 vegi and 2 with meat. We waited eagerly for the pizzas to come out of the oven and I removed Miss D's vegi one first with much ceremony only for the topping to slide of and land on the pull down oven door. The toppings were hastily scraped up and popped back on top of the pizza base but the results were less than appetising.

Thankfully my pizza making skills have improved exponentially since then which is a good job as nothing says a cozy Saturday night like a homemade pizza and a movie.

Vegi Pizza
(Makes 2 thin and crispy bases)


Pizza Base:
250 g strong white bread flour (with extra for dusting)
1 tbsp dried yeast
1 tsp sugar
150 ml hand hot water (1 part boiling water, 2 parts cold)
3 tbsp olive oil
Tomato Sauce:
1 tbsp olive oil
2 large cloves of garlic, crushed
400 ml pasata
1 tsp oregano
Vegi Toppings:
Small can sweetcorn, drained
2 green peppers, thinly sliced
Large red onion, sliced
6 chestnut mushrooms, finely sliced
Ball of low fat mozzarella, drained and shredded
100 g low fat mature red cheddar, grated

For the base:

  • Dissolve the sugar in the warm water, stir in the yeast and allow to sit for 15 minutes.
  • Add the flour to a large bowl, make a well in the centre and add the yeast mixture and olive oil.
  • Mix until combined, turn out onto a floured work surface and knead for 5-10 minutes until a smooth dough is formed.
  • Divide the dough into two and place in a greased bowl, cover loosely with cling film (or shower cap) and leave to rest for 30 minutes.

Tomato sauce:

  • Heat the oil in a heavy based frying pan.
  • Add the garlic and fry for 30 seconds, pour on the pasata and stir in the oregano.
  • Cook for 15 - 30 minutes until the sauce is thick (you should be able to draw a wooden spoon through the sauce and the bottom of the pan will remain visible.
  • Season to taste (the pasata can often be bitter so a decent pinch of salt is needed)

Assembling the Pizza:
  • Grease some baking paper with olive oil.
  • Preheat the oven to 200oC (fan assisted), place baking tray in the oven when cool and allow to heat as the oven heats.
  • Roll out one ball of dough until about 0.5 cm thick.
  • Place base on baking paper and cover with half of the tomato sauce.
  • Top the pizza with half of the toppings.
  • Place on top of the heated baking sheet and cook for 20 - 30 minutes until base is crispy and cheese is brown and bubbling. 
  • Cook the second pizza while you enjoy the first warm from the oven.

Monday 10 May 2010

30-day Muffin Batter

My baby sister (Miss G) came to stay this weekend to get some advice on a presentation she has to do at university next week. As its her final year she has been working really hard on dissertations, presentations,course work and preparation for her final exams. I decided that while she was here she deserved a little TLC, dinner served before 9 pm and some pampering - it also gave me the opportunity to make muffins for breakfast.
I decided to give Rachel Allan's 30-day muffin recipe a go, this is for a batter that can be kept in the fridge for up to 30-days and different 'fillings' added giving a wide variety of muffins. This recipe appeals to me as my favorite muffin is Cherry and Almond - two things that definitely don't appeal to Mr M - and by using this batter I can make myself a few of my favorites without feeling guilty or that I have to eat a whole batch of 10-12 muffins on my own! For Saturdays breakfast I tried out some Banana and Maple Syrup muffins to use up a very ripe banana in the fruit bowl, and some some Berry muffins to use up the last of the fruit in my freezer.

The result was some very tasty little muffins, although they were far from the huge over sweetened muffins found in high street coffee shops, and I am looking forward to trying out some more flavour combinations. I will post for the Berry muffins and Banana muffins today and will do a round up post of all the flavour combinations I try out using up the 30-day batter (I have a suspicion that the batter will be used up well before its 30 day expiry date).

I have given my own variations in ingredients.


30-day Muffin Recipe
Makes around 30 muffins
(Adapted from Bake by Rachel Allen)

3 eggs
125 g soft light brown sugar
100 g golden caster sugar
500 ml skim milk
125 ml grape seed oil
1 tsp vanilla extract
 300 g plain flour
 1/2 tsp salt
 2 rounded tsp bicarbonate of soda
 160 g wholemeal flour
25 g wheat bran

  • Preheat the oven to 175oC (fan assisted). Line muffin tin with paper cases.
  • Whisk the eggs, milk, sugar in a jug. Add the milk, oil and vanilla extract and mix well.
  • Sift the plain flour, salt and bicarbonate of soda into a large bowl. Stir in the wholemeal flour and wheat bran.
  • Stir the wet ingredients into the dry ingredients. This is the basic batter.
  • Add the 'fillings' of your choice and fill the paper cases 3/4 full and bake for 15 - 20 minutes, until set and spongy to touch.
Banana and Maple Syrup muffins: Makes 4 muffins. 200 ml 30-day muffin batter, 1 very ripe banana mashed, 30 ml maple syrup.
Mixed Berry muffins: Makes 4 muffins. 200 ml 30-day muffin batter, 150 g frozen berries (defrosted).

Friday 7 May 2010

Rhubarb and Apple Eve's Pudding

When it comes to dessert Mr M is definitely a traditionalist and counts Sticky Toffee Pudding and Fruit Crumbles both served with custard amongst his favorite. My own dessert preferences are for lighter pud's, generally containing berries, meringue and served with ice cream, although the contents of our fruit bowl and freezer generally lend themselves better to Mr Ms preferences to my own. Last week a census of our fruit bowl and freezer led to the discovery cooking apples and frozen rhubarb that would normally become a Mr M pleasing crumble. I had recently been contemplating the joys of 'Soup and a Pudding' (a very Scottish meal, I think, where dinner consists of a bowl soup followed by a warming dessert and bypassing the inconvenient main course) and the wonderful 'puddings' my mother produced during my childhood. My personal favorites were Queen of Puddings or Lemon Meringue Pie, but the crispy meringue that appealed so much to me is a big no no for Mr M, but an Eve's Pudding seemed like a good use of the fruit and a pleasant change to the inevitable crumble.
This most traditional of British puddings consists of finely sliced apples topped with a light Victoria sponge mixture, and as the cake cooks the apples stew. My own version is a twist on the classic with the addition of rhubarb, which add a tartness to the sweet apples. When I repeat this recipe I am planning to increase the amount of fruit as I thought the fruit to sponge ratio a little mean.
I apologise for the mixture of weights used for the recipe below, I generally weigh in metric when cooking but I learned from my mother and grandmother in pounds and ounces and still find the 4, 4, 2, 4 method best for remembering Victoria sponge quantities.

Rhubarb and Apple Eve's Pudding
(Serves 4-6)
For the fruit:
200 g Frozen rhubarb, defrosted
400 g cooking apples, peeled, cored and thinly sliced
50 g golden caster sugar
For the sponge:
4 oz margarine
4 oz golden caster sugar
2 medium eggs
4 oz self raising flour

  • Preheat the oven to 180oC (175oC fan assisted)
  • Layer the fruit and sugar in the base of an oven proof dish.
  • Make the sponge mixture by creaming the sugar and margarine together in a large bowl, add the eggs one at a time along with a little flour, and then whisk in the remaining flour.
  • Bake in the preheated oven for around 30 minutes until the sponge is cooked.
  • Serve hot from the oven with custard or ice cream. Also delicious cold the next day.

Monday 3 May 2010

Banana Coconut Muffins

I have a vast collection of cook books and love nothing more than a lazy afternoon curled up with a cuppa reading my books and planning future kitchen adventures. Google reader has quickly become an extension of my cookery book collection and I regularly read cookery blogs for inspiration and ideas. Coffee Muffins is a great blog written by a work colleague of Mr M's and as a regular reader I could not help but have a craving for some muffins. Like many households our fruit bowl always contains at least one (and often several) over ripe banana and in order to use them up I turned to another of my favorite blogs Dinner with Julie and adapted her Coconut Banana Muffin recipe to suit the ingredients in my cupboard, and did not include fresh coconut. A major plus of this recipe for me is the use of cups, which saves on having to be precise with weights and also makes the muffins super quick to make.


Banana Coconut Muffins
(adapted from Dinner with Julie)
Makes 10 muffins

3/4 cups plain flour
1/2 cup stone ground wholemeal flour
1 tsp baking powder
1/4 tsp salt
1/2 cup dessicated coconut, plus extra to sprinkle
2 mashed ripe bananas
1/2 cup light brown sugar
1/3 cup grape seed oil
1/3 cup low fat natural yoghurt
1 medium egg

  • Preheat the oven to 180oC, line a muffin tin with muffin cases.
  •  Sift flours, baking powder and salt into a large bowl. Add the dessicated coconut and mix well.
  • Mash the banana, sugar, youghurt and egg in a separate bowl.
  • Add the banana mixture to the flour mixture and stir until just combined. 
  • Divide the mixture between the paper cases, sprinkle with the remaining coconut.
  • Bake for around 25 minutes until puffed and golden.

Midday Mezze

Mr M headed out on Sunday mountain biking and I had a wonderful day gardening planned. Unfortunately the previously forecast sunny day failed to materialise and I was unable to plant out my herbs and edible flowers (I have made it my mission only to plant useful plants in my garden - ones that can be eaten or used for medicinal purposes). In need of some sunshine I headed to the kitchen and discovered some wonderful crisp peppers and juicy olives that were crying out to be teamed up with some hummus.

Before the house move we spent a long time using up store cupboard ingredients and the jars of useful pastes and sauces that live in the back of the fridge and have not yet re-stocked our collection (this has been further aggravated by the loss of last years chutney to mildew). It was a lack of tahini paste that led to the inception of the following recipe and a wonderfully bright midday meal.


Hummus

400g can chickpeas, drained
Small red onion, roughly chopped
Small hand full of parsley, roughly chopped
Large garlic clove, crushed
3 tbsp water
1 tbsp sesame oil
juice of 1 lemon
3 tbsp olive oil
lots of freshly ground black pepper and salt to taste

Place chickpeas, onion, parsley, garlic, sesame oil and water in a blender, blend to a rough paste gradually adding the lemon juice and olive oil, taste regularly and add more or less oil and lemon according to your preference. Season to taste.
Serve with warm pitta or flat breads, olives and a selection of crisp veg. I added a good dollop of some spicy Harrisa paste to the top of my hummus for an extra kick.

Sunday 18 April 2010

Bill Granger's Mirin Beef

I have often jokes that Bill Granger saved my relationship with Mr M, and although this is a bit of an exaggeration I truly believe his recipes did help us avoid a pretty ugly situation. As I have mentioned before cooking and being in the kitchen featured heavily in my upbringing, making me pretty confident in the kitchen and as many of my friends will tell you a bit of a tyrant. I am the first to admit that I can be pretty bossy when it comes to cooking and people tend to avoid offering to help me cook / asking me for help in the kitchen. About a year after we began dating Mr M moved city for his dream job and suddenly every second Saturday night dinner was being cooked in his kitchen! As Mr M got more into cooking we decided to give cooking as a couple a go but it became clear pretty quickly that we needed some unfamiliar recipes that neither of us was familiar with to stop me becoming a kitchen tyrant.

It was by chance that we caught a Bill Granger recipe on Saturday morning TV and decided to give one of his books a go. We invested in Simply Bill and pretty soon we were sharing kitchen adventures. Four and a half years later we still enjoy our time in the kitchen together and we try to keep our Saturday night cooking dates as much as possible. We often like to try new dishes, like Sushi or old favorites like chilli or pizza but every now and again we dip back in to one of Bills recipe books. This Soy- and Mirin-Simmered Beef on rice is from Holiday is a particular favorite as its easy to make, has very little washing up and can be made with ingredients readily found in our store cupboard and fridge. We have tweaked this recipe a little to suit our tastes but I have given you the book version below to allow you to adapt it to suit yours.


Soy- and Mirin-Simmered Beef on Rice
(Serves 4)

150 ml white wine
100 ml soy sauce
100 ml mirin
2 cm piece of fresh ginger, peeled and thinly sliced
3 tbsp caster sugar
1 white onion, thinly sliced
500 g rump steak, thinly sliced

To serve: steamed Japanese rice
baby spinach leaves
pickled ginger

1) Put the wine, soy, mirin, ginger, sugar and 100 ml water in a saucepan over a medium heat. Cook stirring to dissolve the sugar, bring to the boil and simmer for 2-3 minutes.
2) Add the onion, and simmer for 4-5 minutes, until the onion is soft. Add the beef and cook for 1-2 minutes until the beef is cooked through.
3) To serve, spoon rice and spinach into 4 bowls. Top with the beef and onions and ladle some hot broth over the top. Garnish with the pickled ginger

We tend to add extra ginger and onions when making this, and use whatever rice is in the cupboard (although this can be difficult to pick up with chopsticks!). In the version we made last night we substituted the spinach for a baby leaf salad that we had in the fridge which went surprisingly well.


Spicy Bean Stew

Whenever I come across a recipe that catches my eye I often jot it down on a piece of paper, or star it in my google reader. The best ones then migrate to a notebook or recipe card and their origins are often lost, although since writing this blog I have made a special effort to keep a note of where I find my recipes.
My Spicy Bean Stew started in my notebook as Chilli Black Bean Stew and with a few adaptations from the original it is one of our favorite store cupboard meals. The original recipe came from an article called The Winter Vegetarian from the Waitrose Food Illustrated magazine and can be found on their website. The stew is a perfect one pot supper and by substituting the dried beans with canned ones it can be ready in around 30 minutes.


Spicy Bean Stew
(serves 4)
150 g dried mixed beans
1 tbsp olive oil
2 red onions, roughly chopped
1 green chilli, finely chopped
1 tsp ginger, grated
1 tsp harrisa paste
120 g dried apricots, roughly chopped
2x 400 g canned cherry tomatoes

1) Soak the beans in cold water overnight, strain, rinse and cook according to the packet instructions until tender (45 min - 1 hour).
2) Heat the oil and cook the onion and chilli until soft (around 5 min), add the ginger and cook for 5 minutes.
3) Add the harrisa, apricots and stir in well, add the tomatoes and beans.
4) Cook uncovered for 5 - 10 minutes until piping hot.
5) Serve with a good dollop of natural yogurt and chopped coriander.

I love to eat this stew with lovely freshly made flat breads, which are far superior to any shop bought equivalent, as seen in the photo above. Mr M prefers corn bread, I always make for 4 and freeze the leftovers for another day and will post the most amazing corn bread recipe which I will make when I serve up the leftovers next week.


Friday 16 April 2010

Tasty turkey pie

I don't do pastry, with the exception of pate brisee, which I don't count due to its simplicity - to me pastry is something that is tricky to make and often unsuccessful, and I have always felt that shop bought pastry is a tasty and cost effective alternative to making your own. The ease of this product is negligible, however if sourcing the pastry is difficult. Our recent move has taken us from a city flat with a nearby supermarket, plentiful delicatessens and an Asian greengrocers with every spice under the sun, to a village with a post office and corner shop and not much else. No more can I nip out for the missing ingredient for my creations at the last minute and when I decided the left over bacon and turkey in the fridge would be perfect in a pie the only way I could achieve this was by making my own pastry.

Tasty Turkey Pie
(serves 2)

1/2 quantity flaky pastry (I used this flaky pastry recipe from the Be-ro cook book, the extra pastry freezes easily for later use)
2 turkey breast fillets, sliced
3 rashers lean bacon
1 garlic clove, crushed
Small onion, thinly sliced
250 g mushrooms, sliced
small leek, thinly sliced
thick white sauce (made with 1 tbsp plain flour, 1 tbsp low fat spread and around 200 ml skim milk)
olive oil
salt and pepper

1) Fry the onion and garlic in a little olive oil until soft (2-3 min), add the turkey and fry until browned.
2) Add the mushroom and leek and fry for 5-10 minutes until they are soft. Season the mixture to taste.
3) Spoon the mixture into a pie dish and pour over the turkey mixture.
4) Roll the pastry to a 2-3 mm thickness, to cover the pie dish and cover the turkey mixture.
5) Place into a very hot oven (Pre-heated to 200 oC) and turn the heat down to around 175 oC after five minutes. Bake for around 25 - 35 minutes until cooked through (I am still getting to grips with my new fan assisted oven so you should adjust the temperatures and times to best suit your oven).


This pie works equally well with a veloute by substituting the milk in the white sauce with chicken stock.

Wednesday 7 April 2010

Vegetable Risotto

The last month or so has been pretty hectic in our household and I have sadly neglected our nutritional needs when it comes to the main meal. First packing our old, drafty flat and then moving into our new home has meant that not only have I barely had time to cook but every time I want to make something more complicated than a frozen pizza I have had to hunt through boxes and bubble wrap for the correct tools. The result of quick kitchen fixes was that by the end of last week Mr M and I were starting to feel a little run down and most defiantly in need of some vitamins.

Risotto is in my mind the kitchen cure-all. When you are feeling low it is comforting and warming and with the right ingredients it can be the most amazing mood enhancer. It is also the perfect way to pack in as many different vegetables as possible while still making a delicious and enjoyable meal. For my basic vegetable risotto I loosely follow Arrigo Cipriani's Risotto alla Primavera recipe from the Silver Spoon, although I have altered the vegetables used to suit our preferences and what could be found in the local supermarket (as my veg garden hasn't yet been started and we haven't managed to find a local veg box scheme yet). The recipe bellow is our veg choice with my own adaptations, although I fully recommend the original veggie suggestions.


Vegetable Risotto
(Adapted from Risotto alla Primavera from the Silver Spoon)
Serves 2
Vegetables:
1 tsp olive oil
1 crushed garlic clove
2 oz mushroom caps, sliced
1 tbsp onions, finely sliced
10 asparagus spears, sliced
1 red pepper, diced
1 small leek, white part finely sliced
75 g fine beans, sliced
salt and pepper

Risotto:
1/2 tbsp olive oil
1/2 small onion, finely sliced
175 g risotto rice
1 l chicken stock (vegetable stock works just as well)
20 g butter
3 tbsp parmesan, finely grated
salt and pepper

Vegetables:
1- Heat the oil in a large frying pan, fry the garlic for 30 sec and remove.
2- Add the mushrooms and fry for 3-4 minutes untill softened. Add the onions and cook for 2-3 minutes.
3- Add the remaining vegetables and cook for 5-10 minutes until softened.
4- Season the vegetables to taste.
5- Remove the vegetables from the pan and set aside.
Risotto:
1- Heat the oil in a large pan, add the onion and cook over a medium heat until soft.
2- Stir in the rice, lower the heat and cook for a few minutes until the rice is translucent.
3- Add the stock gradually, stirring all the time. Bring to the boil and continue to add liquid as each addition is adsorbed.
4- After 10-15 minutes add the vegetables and continue to cook for 10-15 minutes until the rice is tender and creamy.
5- Remove from the heat, stir in Parmesan and butter. Season to taste.

According to the recipe only 750 ml of stock should be needed for the amount of rice used, but I used closer to 1 l. With the exception of a no stir recipe, that I love making I never find the amount of liquid in the recipe to be enough. I have no idea if this is due to the type of rice I use or the way I cook the risotto. Does any one have similar problems or is it my own impatience?